Showing posts with label Furniture. Show all posts

09 January, 2015

Rifle Rack Construction Method and Assembly

I have been asked for details on how I constructed my Easy Build Compact Rifle Rack. Here are some pictures that may help you make sense of the cutting process and the assembly.

A model of the finished rack

I started by cutting the basic parts from 20mm thick board. On the left you will see both sides cut from the same board. On the right you will see six parts all the same width. The top two are the top rail assembly, the bottom four make up the base assembly.

Note: For my American friends, I am sorry the measurements are metric, however most of them are actually multiples or fractions of an inch so it would not be too difficult to follow along.


Overall dimensions of the parts

 Here is a close up of the top rail assembly and the layout of the rail.

Marking out the top rail

 After cutting it looks like this.

The top rail after it has been cut with a jigsaw
 Next I cut the oval holes in the base plate. These holes must align with the top rail and be equally spaced.

Each hole is two 60mm diameter circles

After cutting it looked like this.

I cut the holes with a 60mm holesaw and a jigsaw

 The sides are cut from the same board.

Layout of the sides
After they are cut they look like this.

I cut the sides with a jigsaw.

With all the parts cut out they should look like this.

I also rounded over the edges with a round-over bit on my router table

In the next images I will show the basic assembly. So that you can follow along I have coloured each part.

If Skittles made rifle racks

I first assembled the base and the top rail. I used a biscuit jointer and glue. These could simply have been glued with the parts butted up against each other or possibly with dowels or even screws.

The base and top rail assembly

I then joined the base and top rail assembles to on of the sides, checking for square.

It is critical to check for square
Then the other side is joined, again checking for square. After it was all solid, I trimmed the front of the top-rail assembly flush with the sides. This could have been avoided by better planning at the design stage of these drawings.

Measure twice cut once applies even in the virtual domain

This is the actual finished piece. You can see it differs only slightly from the drawing.

My original rack dry fit (not yet glued)
I hope this short pictorial explanation will help you understand the construction of the rack.

Please be aware like all my blog these drawings are protected by the Creative Commons Attribution-NonCommercial-ShareAlike 4.0 International License

Thanks for reading! :)

08 January, 2015

Easybuild Compact Rifle Rack

I had a need to build this compact rifle rack to fit inside a closet. The requirements were that it had to;
  • be easy to build
  • fit a range of rifles from short carbine to long rifle size
  • be stable
  • fit in a 460mm(18 inches) space.
I built this little rack out of reclaimed pine shelving which came from a warehouse which closed down.

Read all the way to the bottom if you are interested in one of these racks

My finished compact rack
The reclaimed shelving I got from freecycle. It is about 20mm (6/8 inch) thick, close grained pine, with very few knots. The closer the grain the slower the growth and generally the stronger the wood.

The reclaimed shelving was quite grubby
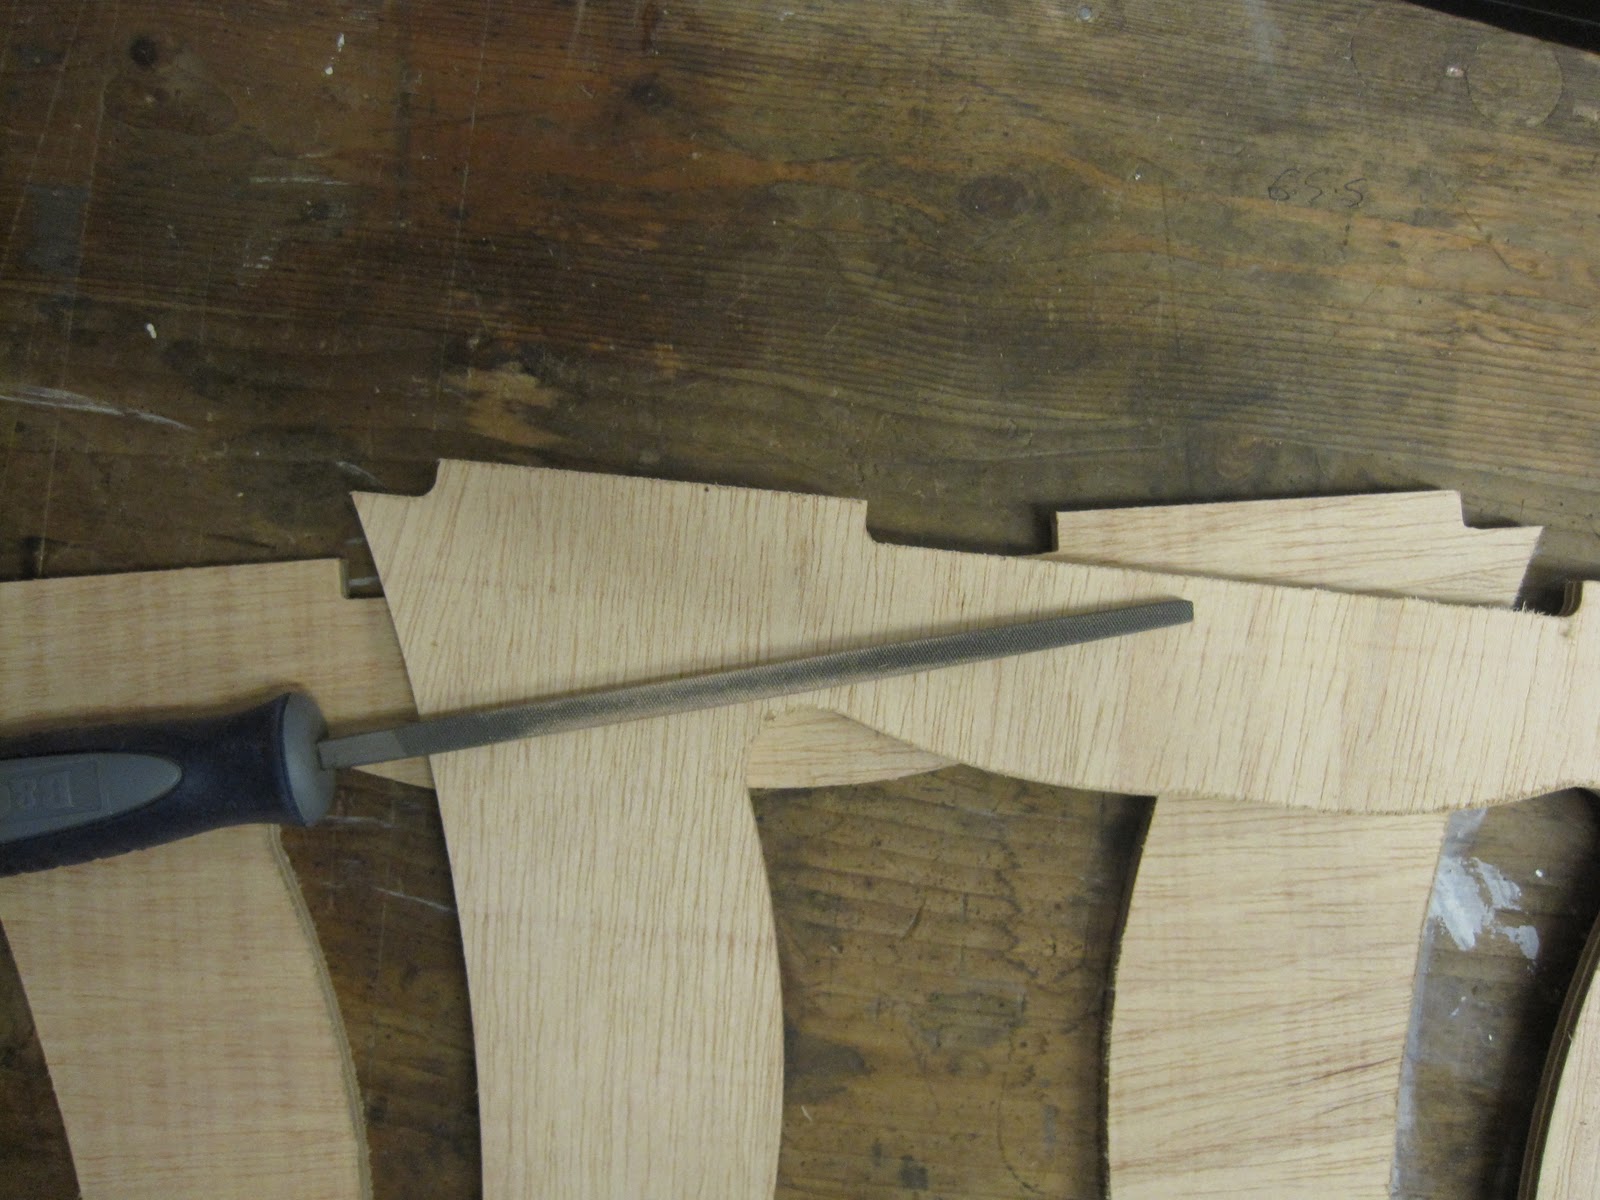
I drew out the shapes for the rack and cut them on the table saw and the hand held jigsaw. after a fair bit of sanding with the orbital sander the wood began to show through. It was very messy, and the worst kind, dust!

A part sanded board
Options for fixings were, screws, dowels, glue but I decided upon #0 biscuits. Biscuits are a wooden spline which sits in a slot cut by a biscuit jointer. These are glued making for a much stronger joint than simply with glue alone.

Biscuit jointer, a biscuit and the joint
With all the parts cut, sanded and the edges rounded over on my router table with a round-over bit, I was able to dry fit (with no glue) all the parts together for a first look. This next image lets me explain how the rack will work. The fore-stock of the rifles will rest against that wavy top rail. The gummy-bear shaped hole on the base allows two thirds of the butt-stock to sit in the hole while one third of the but stock rests on the base plate but not in the hole. This causes the rifle to tilt slightly backwards and rest against the wavy top rail. If this works the rifles should be stable enough in the rack.

The biscuit joints allow it to be test assembled without glue

Ok, I am happy with the design, now for the glue-up and clamping after checking for square. Note that I used "Gorilla Glue". This was an experiment, usually I would use a PVA based glue for furniture. On reflection, if I were to build another I would go back to a PVA based glue. I have now read several reports where PVA glue beats expanding polyurethane glues like Gorilla Glue, hands down in almost all situations. Click here to see a video of PVA versus Gorilla Glue.

I never have enough clamps

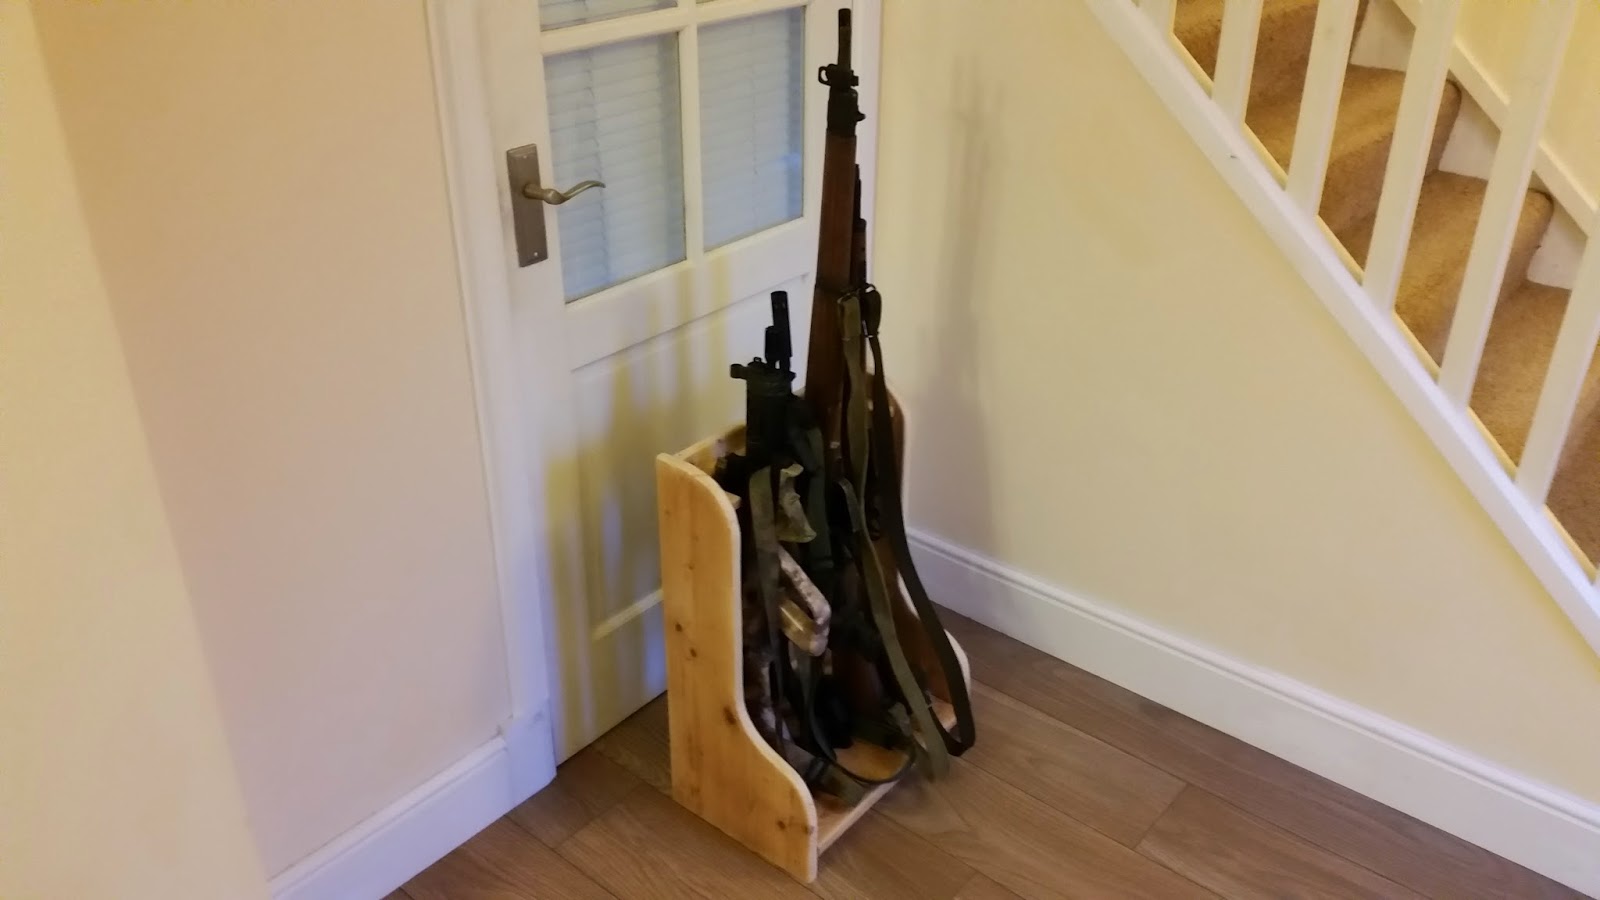
Here is the finished piece. Is it stable? Yes it is! I am able to pick up the entire loaded rack and move it around without the rifles all toppling around. Does it take a range of rifles? Yes it does!

L to R: AUG Carbine, SIG 552, XM177e1, M14, Lee Enfield No4.

Was it easy to make? Yes, with the correct tools, particularly the biscuit jointer. Other tools I used are my table saw, jigsaw, table router and round-over bit a mallet and some clamps.

Small but mighty

Does it fit the 460mm (18 inch) space? Yes it does with a size of 460mm wide (18 inches), 300mm deep (12 inches) and 610mm tall (24 inches)

In situ

In conclusion, I think the design worked really well but if there were a next time there are only two things I would do differently:
  1. I would use a PVA glue and not a Polyurethane based glue, and
  2. I would not use a reclaimed board, I would build it from nice furniture grade Birch plywood.
IMHO, This project was definitely a success. I have still to give it a finish. I will probably use Danish Oil or even a dark stain. When i make up my mind I will post another photograph.

If you are interested on building your own, if I get enough people wanting to purchase a self assembly kit to make it financially feasible I may make a few self assembly kits available. All you would need to do is glue it up and paint. I would do all the cuts, jointing and supply the biscuits.

Update: I have added another blog post with relatively detailed technical drawings here.

Otherwise, if a self-assembly kit might interest you please click here.

12 December, 2011

Making my first footstool

Over this weekend I thought I would have a go at designing a simple piece of furniture to cut on my home-made CNC Router.

I needed something small, easy to cut and something that would actually be useful around the house. I came up with the idea of a footstool/pouffe styled with 1950s influences. The footstool would have a top and two interlocking legs.


I started by drawing my footstool on Solid Edge 2D drafting, exporting to DXF and loading these into CamBam to generate the toolpaths.


This tool-paths were then imported into EMC2 on my workshop PC, and the tool-paths are actually performed as cuts by my CNC router.


Here is a short noisy video of the top being cut.


The interlocking legs where then cut.


So with all the parts cut, they just needed a quick tidy with some sandpaper and the squaring of the joints with a square file.

This picture shows the legs, the one on the bottom has been 'squared up' the other still needs to be filed square so the joints fit together..


So with the parts tidied, I push fit it all together on my workbench. When I tried to pull it apart again, I was surprised just how snuggly it all fitted together. It should be very strong compared to a similar hand cut project.


Here is a couple of shots of the stool. I just need to think on how I will finish it. Will I paint it, upholster it, woodstain it? Hmmm...


When I make my mind up, I will do a part two.

Thanks for reading.