
 |
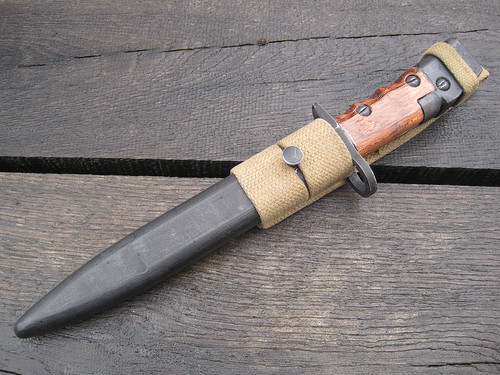
| The real deal! image:Field Service Antique Arms & Militaria |
The reproduction bayonet would not have a blade but would permanently be fixed to it's scabbard. The scabbard would then be hung in a real canvas WW2 vintage bayonet frog that is part of Pattern 37 Utility Webbing.
Or if you prefer to be formal, Web infantry Equipment, Pattern 1937.
Basically this project is to build an imitation 'bayonet' for the purposes of a re-enactment prop. It was not designed to be an exact replica, rather a stand-off replica that would be difficult to spot as such from a couple of meters away. Of course a stand-off replica doesn't need a real blade, and not having a real blade avoids any potential issues with the law.
 |
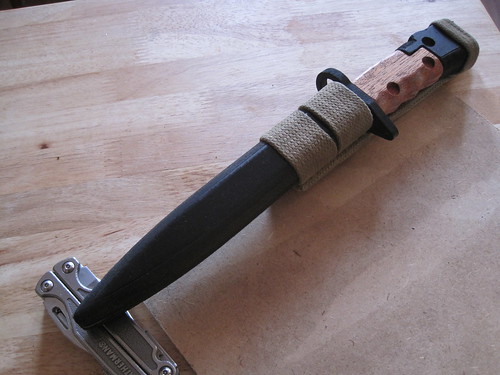
| My finished replica bayonet |
The differences are: The lower handgrip is made from Mahogany, actually Merrantti. On the real thing this would be made from 'Tufnel' a brown fabric impregnated with resin and formed into a block. The replica also doesn't have the mounting clip.
The first job in this project was to measure every dimension on the photograph and turn those dimensions into a 2D drawing in Solid Edge 2D Drafting. Then that 2D drawing is turned into a set of 3D cutting commands in CamBam and loaded into EMC2 on my CNC control PC.
EMC2 then controls the cutting tool, in this case a 3.2mm, two flute straight cutter.
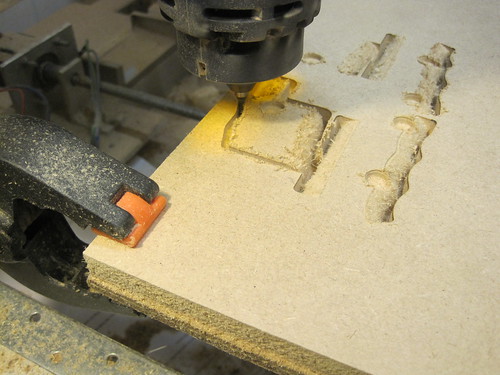 |
| Here you can see the handles being cut in MDF, that I later swapped with Merrantti. |
 |
| The handle has four separate interlocking parts. |
The entire project is built as two halves. Here is one of the halves.
 |
| The MDF halves that were intended to be used to make moulds. |
I had intended to make silicone moulds of all the parts and cast multiple units, however I was let down by my casting supplies vendor. Grrr! In order to get the project ready by the due date, I decided to recast the bayonet lug/hand guard in pewter 5mm thick and use the other parts for the final assembly. The MDF version of that
bayonet lug/hand guard (shown above) is almost double the thickness as it was intended to be used to build an open faced mould.
After the first coat of paint, it looked like this.
 |
| One coat of paint |
Kind of lifeless in my opinion. I needed to refine the shape, fit some hardware, apply many more coats of paint (eight in all) and weather them to bring it to life.
I buffed the paint off the metal edges, and deliberately chipped and dinged the paintwork for that vintage look.
This project took substantially longer than I planned. The paintwork took several days to do, although most of that was waiting for it all to dry. Real examples of this Bayonet are increasingly difficult to find and sell in excess of £200.
I'm happy with the result.
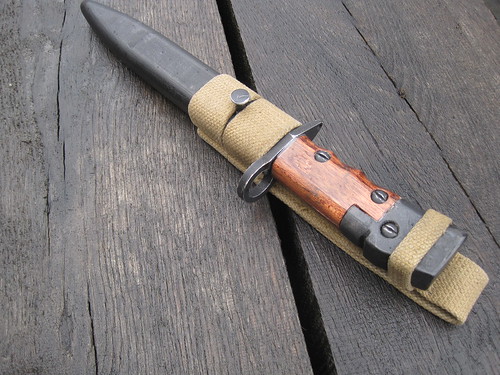 |
| Weathered but interesting, just like the author. |
I buffed the paint off the metal edges, and deliberately chipped and dinged the paintwork for that vintage look.
This project took substantially longer than I planned. The paintwork took several days to do, although most of that was waiting for it all to dry. Real examples of this Bayonet are increasingly difficult to find and sell in excess of £200.
I'm happy with the result.